Showing posts with label Beef. Show all posts

Friday, December 24, 2010

A Roast to Remember


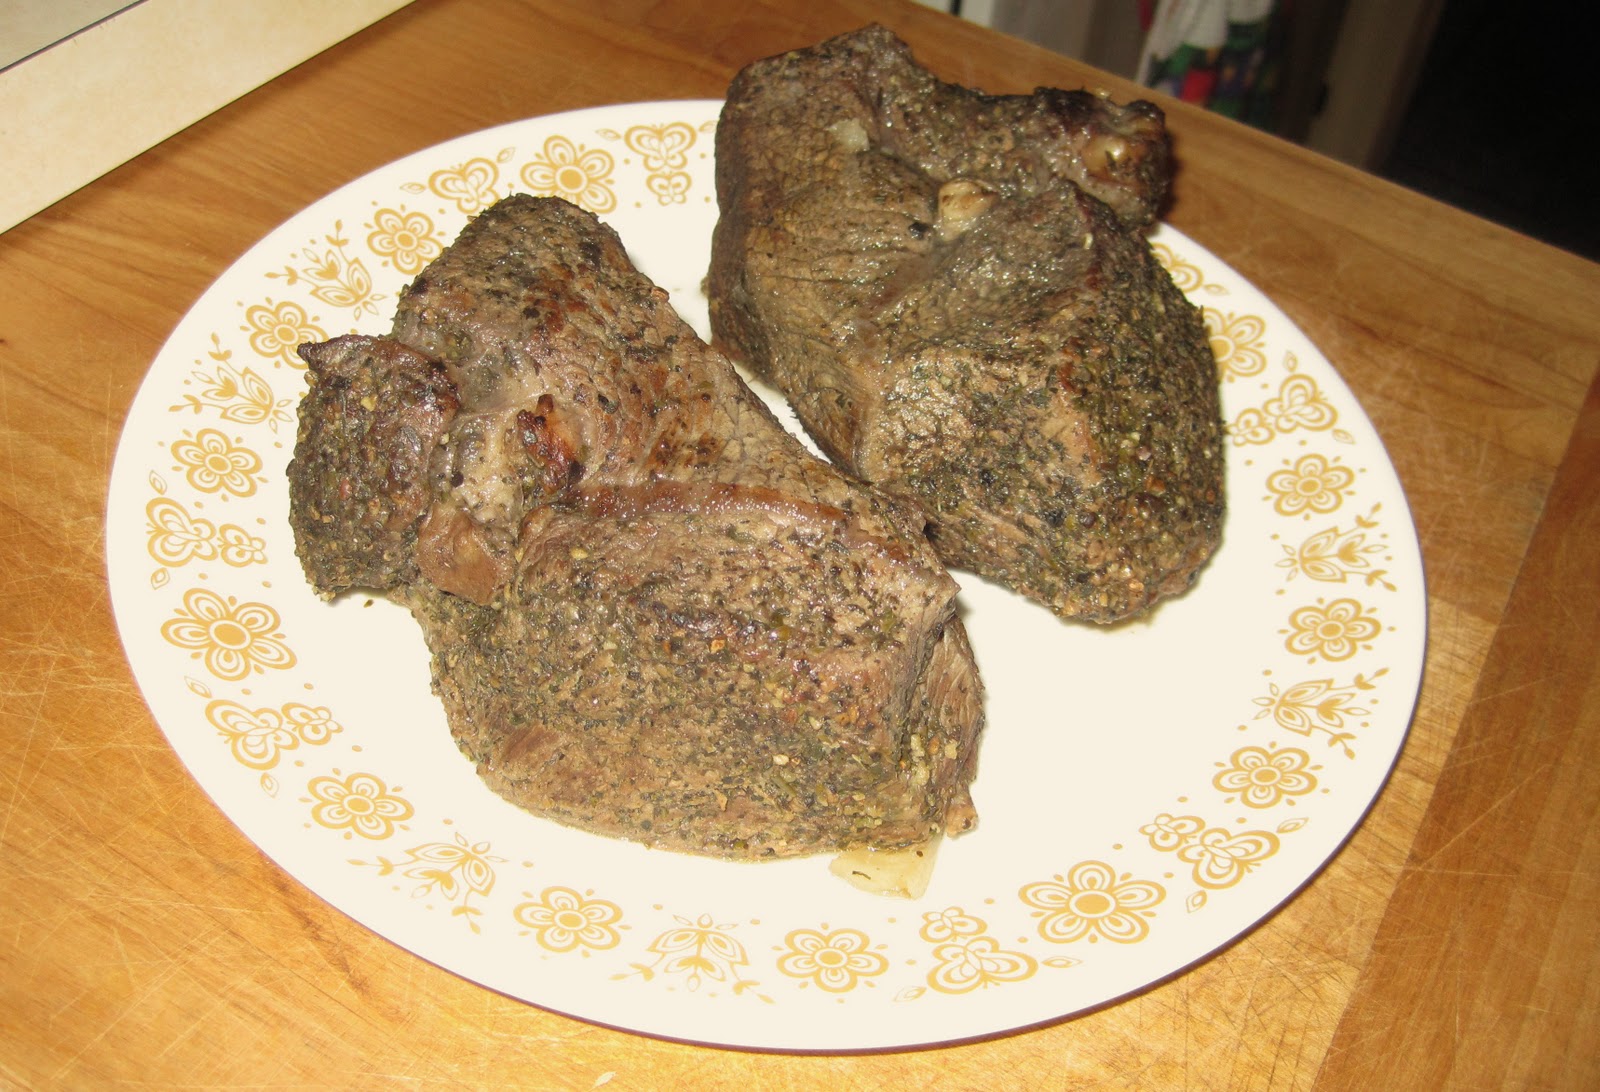
Christmas Roast - A Sirloin Tip Roast
On Christmas Eve, Rachel & I were back in Wisconsin in my hometown of Sussex staying with my parents for the holidays.  This December, there has been plenty of snow in the Midwest, so it definitely looked like (and felt like) winter outside.

My mom and I were thinking about what to cook for dinner for the four of us, and she found a boneless sirloin tip roast in the chest freezer, weighing about 3 1/2 pounds.  When you're only two people in a household, it's hard to find an occasion or the appetite to cook up such a large cut of meat.  And with the chilly weather and the holiday, a deliciously cooked roast sounded perfect!

The roast itself was from Kummrow Farms, a beautiful small farm near Oconomowoc, Wisconsin (the town's name was derived from coo-no-mo-wauk, the Potawatomi term for "waterfall").  Kummrow Farms feeds their cattle (and bison) almost entirely on grass and hay, and does not use hormones nor antibiotics.

Roast from Kummrow Farms

Back to the cooking.  Normally, I would bake the roast in one piece until its center is a beautiful juicy, deep red color.  However, my parents prefer their beef medium to medium-well.  To tailor dinner to all four of us, I cut the roast in half.  The first half (for my parents) went in the oven about 20 minutes before I added the second half. 


The seasoning for the roast was simple.  I used a combination of salt, fresh ground black pepper, and Penzey's Italian Herbs (rosemary, oregano, and thyme).  The spice mixture was rubbed onto all sides of the roast pieces.  Then I let the roast sit out on the counter, allowing it to warm to room temperature (about 25-30 minutes).


Once the meat was prepped, I added my potatoes, onions, and celery to the roasting pan.  Since the roast was quite lean (almost all the excess fat had been trimmed off), I added some rendered pork fat to the vegetables to ensure there was enough fat in the roasting pan to keep the beef from drying out and to give it that extra boost of flavor.  I placed the pan in the oven while the roast sat on the counter because I wanted to make sure that the potatoes would be cooked through by the time the roast was done baking.

Before adding the roast to the pan, I always brown/sear it.  I feel it seals the juices inside the roast, and ensures a juicier end product.  But you can skip this step if you're pressed for time.

For side dishes, I cooked up some delicious cinnamon-honey glazed carrots, using the recipe from Food & Wine (carrot recipe link).  I also baked my buttermilk biscuit recipe, which I posted last month (biscuit recipe link). 


For wine, we chose a 2007 La Linda Malbec and a 2003 Proemio Cabernet Sauvignon, both from Mendoza, Argentina.  These are big, full-bodied red wines with plenty of spice, acidity, and tannins to handle the pepper and herb flavored roast.  Other great options would be a full-bodied Syrah or Merlot.  If we had a nice red Bordeaux on-hand, it would have been another good option.


The British Empire

I looked briefly at the history of the roast.  While I'm sure humans have been roasting cuts of bison, pigs, cows, and woolly mammoths for millennia, the modern 'roast' seems to be a British invention.  I read somewhere that roasts were a common Sunday meal because the bakery ovens, which were used for baking bread throughout the week, were available on Sundays because the bakeries were closed.  It is interesting to look at a map of British influence and where roasts are most commonly served.  Today, the UK, Ireland, Australia, New Zealand, the US, and Canada, which were all at one time under the control and/or influence of the British, are places you'll likely find roasts on the family menu.


Merry Christmas everyone!  Enjoy the holiday season and the time spent with friends & family.


Sirloin Tip Roast Recipe

Ingredients:
One 3 to 4-lb sirloin tip roast (or similar beef roast)
1 large onion, roughly chopped
2 to 3 lbs. potatoes, cut into bite-sized pieces
2 stalks celery, diced
1 medium carrot, diced
3 cups beef stock (you can substitute chicken or mushroom stock)
1/2 cup red wine
2 T. olive oil or rendered meat fat
Dried herb mixture (combination of rosemary, oregano, and thyme)
Dash of cayenne
Salt & Pepper


Directions:
1. Preheat oven to 350° F
2. Prep roast by rubbing salt, pepper, and herb mixture all over the outside
3. Leave roast on counter at room temperature for 25-30 minutes
4. Place vegetables in a large roasting pan, add salt, pepper, herb mixture, cayenne, and oil/fat.  Stir and place in the oven.
5. Bake, uncovered, for 25-30 minutes.
6. Add about 1 cup of stock to the pan (make sure there's always enough stock to fill the pan about 1/2" to 1" high)
7. Turn the oven down to 275° F8. Brown all sides of the roast in a large skillet, then add to the roasting pan.
8. Cover and bake for about 45-60 minutes.  It might need more time if it's a larger roast or if you prefer medium or medium well beef.  Use a meat thermometer, placing in the thickest part of the roast.  145° F for medium-rare, 160° F for medium, 170° F for well-done.


Tuesday, November 2, 2010

Beef Stew and Buttermilk Biscuits


Another favorite dish of mine is what my mom calls ‘no-peek stew’, famous in our family for throwing everything into a roasting pan and letting it bake for hours (without peeking at it). It’s perfect for placing the stew in the oven after lunch, going out to run errands, relax with friends, or watch a couple football games, and then return to your kitchen smelling wonderful. The aromas from this stew will surely have your mouth watering.


The recipe itself is a hand-me-down from my mom's aunt, and my mom has made it throughout my life. In fact, my brothers still request it specifically when visiting my parents, hoping for the classic childhood, home-cooked meal. Like my siblings, I also love this stew recipe, as does my better half (also my biggest fan). It’s particularly good for colder days (if you’ve been reading my last few blog entries, you might notice a trend that I’ve been cooking for the cooler weather we’ve been experiencing here in New York). And of course, you can’t forget the buttermilk biscuits and a tall glass of milk (yes, in Wisconsin, the dairy state, we love our milk, and yes, milk is commonly served with dinner). 


The essence of the recipe remains the same as my family’s version, except I have added a few things. First, I always add onion. Even if you have non-onion lovers in your household, you can enjoy the rich onion flavor without the “chunks” because the five hours in the oven will essentially melt the small diced up onion. Also, I add mushrooms because I love them, and they also break down a bit. But if you or your family members don’t like them, feel free to cut the mushrooms out. Another modification is the substitution of some of the carrots for other similar root vegetables, such as turnips and parsnips. Adding a wider variety of veggies always makes a stew a little more fun, both in flavor and in texture. Again though, if you’re looking for a simpler version, just use carrots. 


Now…the biscuits. While I have been ‘cooking’ for several years now, I have recently discovered the fun of baking. It has required a bit of patience on my end, and I have learned to strictly follow recipes (which is counter-intuitive for me since good cooking is all about improvising). But the results are definitely worth it, especially with these homemade buttermilk biscuits. The other great thing about baking things from scratch is you can control the batch size (i.e. you can half or quarter a recipe if serving only two people). I’ve also noticed that there is a fairly steep learning curve, meaning that once you’ve practiced, you start to greatly speed up the process. For example, I made this biscuit recipe for the third time the other night, and it was very easy now that I know the process. In fact, it only took about 15 minutes to prep and 15 minutes to bake. 


Well, I hope you enjoy this family recipe out of the heart of Wisconsin. It’s a good one. As for the biscuits, I learned all I needed to know about buttermilk biscuits from the blog, Food Wishes – Video Recipes. John does a great job showing you how to make the biscuits through his video, which might be helpful if my recipe is unclear (like I’ve said, I’m still new to baking…so I did my best to create a simple baking recipe). 


Beef Stew 

Serves 4-6 people 


Ingredients: 


1 ½ lbs. beef stew meat (cut into ½” cubes) 

1 ½ cups carrots or similar root vegetables such as turnips or parsnips, cut into bite-sized pieces 
2-3 cups potatoes, cut into bite-sized pieces 
½ cup diced onion 
2 stalks celery, diced 
6 oz. button mushrooms (optional) 
2 T. corn starch mixed with 2 t. water 
1 package Lipton Dry onion-mushroom soup mix* 
1 T. Sugar 
1 ½ tsp salt 
¼ tsp pepper 
12 oz. tomato juice 
12 oz. water 


*I have tried creating substitutes for this product because I generally believe homemade is better than processed; however, my three or four attempts have all come up considerably short of the Lipton soup mix, so my advice is to stick with it. 


Directions: 

1. Preheat oven to 275ยบ F 
2. Mix all the ingredients in a large roasting pan or a casserole dish 
3. Cover and bake for 5 hours 
4. Serve 


Homemade Buttermilk Biscuits 

Makes about 5-6 biscuits 


Ingredients: 

1 cup all-purpose flour 
1 tsp baking powder 
1/8 tsp baking soda 
1/2 tsp salt 
3 1/2 T. unsalted butter, cut into thin slices, chilled in freezer 
3/8 cup cold buttermilk 


Directions: 

1a. Place butter in the freezer for at least 30 minutes (important for the texture of the biscuits) 
1b. Preheat oven to 425 F 
2. Mix all dry ingredients in a large bowl 
3. Using a pastry blender (http://www.kingarthurflour.com/shop/items/pastry-blender), cut the butter into dry ingredients for about 3-4 minutes, until the butter and dry ingredients are well mixed and have a consistency similar to Kraft grated Parmesan cheese 
4. In the bowl, make a shallow valley in the butter-flour mixture for the buttermilk 
5. Pour the buttermilk (it should also be kept very cold) into the valley 
6. Gently mix the buttermilk into the mixture, just until it is absorbed (careful not over-mix) 
7. Dump dough onto a flat, clean surface 
8. Using your hands, work the dough a little until it begins sticking together 
9. Work the dough into a rectangle shape, about 1" thick, and fold it on top of itself; do this step a 2-3 times 
10. Add a little flour to the surface area, and use a rolling pin to roll the dough into a thin 1/2" layer 
11. Using a biscuit cutter or the top of a glass, cut out biscuits 
12. Mix scraps together and repeats steps #10 and #11 
13. Place biscuits on a thin cookie sheet 
14. Using your thumb, press down gently on each biscuit 
15. Take a little extra buttermilk, and brush onto the biscuits 
16. Bake for 15 minutes, or until the biscuits are a nice golden brown