Tuesday, January 25, 2011

Time for Thai

Chicken with Basil
Visiting our friend in Los Angeles a couple weeks ago, Rachel & I had the privilege of learning a traditional Thai recipe from our friend's father.  Originally from Thailand, her father, Charlie, loves his country's cuisine, which was apparent throughout his exciting cooking lesson.  The dish was chicken with basil, one of our favorite dishes from one of our favorite cuisines.


My teacher, Charlie, and me
Charlie started the lesson by explaining the importance of high-quality, fresh ingredients.  He showed me the proper fish sauce, soy sauce, and the basil that he bought earlier that day at their local Asian market outside of LA.  The recipe, he explained, was like many Thai dishes...very simple, based only on a few key ingredients, and easy to make.  Of course, like any fast-cooking stir-fry dish, it's important to prep everything before you begin.  Cooking steps are so brief that you won't have time to clean, cut, or prep anything mid-way through.


In this particular recipe, the flavor comes from the garlic, peppers, fish sauce, soy sauce, and basil.  Lots and lots of fresh, delicious, aromatic basil.  Another interesting tip from Charlie was the use of ground chicken rather than chunks of breast or thigh.  This texture allowed for more of the sauce, garlic, and peppers to coat the chicken.


Garlic and peppers in the mortar & pestle

Charlie stressed the importance of the chef actually tasting the dish as it cooked.  A recipe is only a guide, and the chef needs to taste the food to decide if extra fish sauce, soy sauce, sugar, or even peppers should be added.  His/her tastes, or the tastes of the guests, may dictate slightly different levels of these ingredients.  So remember this lesson when making your Asian dishes (or for that matter, any cuisine).


Thailand, for those not familiar with this beautiful country, is located in Southeast Asia, not too far north of the equator.  Burma (or Myanmar) to the west, Laos and Cambodia to the east & north, and Malaysia to the south, Thailand is one of many countries in this region with delicious food.  But for one reason or another, many Thai dishes offer more pronounced flavor than its regional counterparts.  Perhaps this is the reason that its cuisine can now be found in cities throughout the world.  Or maybe the Thai government did a good job marketing it.


Enjoy!  I recommend serving with beer, or a sweet white wine (Riesling, Gewurtztraminer).  While white rice seems to be more traditional, you can also serve with brown rice for a healthier option.  Another nice addition would be a serving of papaya salad or a delicious, spicy Thai soup.


Ingredients:
1 lb. chicken, ground (or finely minced with a knife)
8 cloves garlic, finely diced
3 to 5 bird/Thai chilies, minced
1 cup long bean (or green beans), diced*
1 T. fish sauce, or more to taste
1 T. soy sauce, or more to taste
1/2 tsp. sugar, or more to taste
1 cup packed Thai basil
3 T. vegetable oil

*May substitute Thai eggplant


Directions:
1. Using a mortar & pestle, grind the garlic and peppers into a rough paste (you can also use a food processor, but the mortar & pestle is preferred)
2. Heat a wok to high heat, add the vegetable oil
3. Once hot, toss in the garlic-pepper paste, stirring quickly to coat it in the oil
4. Saute for 30 seconds
5. Add the chicken, stirring well
6. Saute for 3-4 minutes, or until the chicken is cooked through
7. Add the fish sauce and soy sauce, stir
8. Saute for another 2-3 minutes; taste to see if additional soy or fish sauce is needed
9. Add sugar, stir
10. Add beans (or eggplant), stir
11. Saute for 1-2 minutes
12. Add basil, stir
13. Taste again for soy sauce, fish sauce, and sugar.  Also see if you want it spicier, and add more peppers if necessary.
14. Turn off heat, serve with steamed rice


Saturday, January 8, 2011

Scalloped Potatoes & Ham: A Betty Crocker Classic


Scalloped Potatoes and Ham
A few weeks back, Rachel & I had some friends coming over for a dinner party.  From 8 O'Clock Ranch, our CSA (Community Supported Agriculture) in upstate New York, we had a beautiful fresh ham in the freezer.  Fresh ham might seem a little odd at first because the vast majority of ham sold in the grocery store has been cured, smoked, or both.  Fresh ham, if cooked without curing or smoking, is not too different from a roast pork loin (except it's from the leg rather than the back of the pig).  If you decide to cook the scalloped potatoes and ham recipe, you can buy a Smithfield or similar pre-cooked country ham.


With a 4-pound ham and seven people, I thought it would be fun to do a ham themed meal.  Rachel & I would serve three courses, each using the cooked ham (I cooked it ahead of time).  The first course was slices of multi-grain bread, topped with a sweet Bourbon mustard, thinly cut ham, a thick slice of Swiss cheese, and a mayo-based red cabbage & apple slaw.  Yum!


The second course was a yellow split pea soup, which of course depends heavily on the rich ham flavor.  It's difficult to make a good split pea soup without pork. 

I found this particular recipe on Food Network's website.  Here's the recipe link: Ham & Split Pea Soup.  While searching for green split peas at my local Whole Foods, I came across yellow split peas.  In fact, Whole Foods didn't even carry green split peas for some strange reason.  Anyway, the yellow split peas are supposed to be more delicate and not quite as hearty as green split peas.  Plus, as one of our friends said, it looks a lot more appetizing than the famous off-putting green color of classic split pea soup. 

Patience is key with this recipe, so make sure you have plenty of time to cook the soup.  It took about three hours of cooking the soup on medium and several additional cups of water added to the pot as it reduced, before the split peas softened and broke down.  So plan ahead!


The third and main course was the scalloped potatoes and ham.  This is a recipe I have grown up with all my life.  It's perfect for reusing cooked ham from a big holiday or family gathering, which is how I often ate it as a child.  The salty ham, creamy white sauce, and thinly sliced potatoes deliver a wonderfully balanced flavor.  I cut the ham into thickly sliced, bite-sized pieces, but you could dice it if you prefer. 


To make the recipe, which is a Betty Crocker classic, you only need a handful of ingredients: onion, celery, milk, butter, flour, and of course, ham and potatoes. 

If you decide to use a fresh ham, I recommend  brining it for 10-12 hours before cooking.  Also, you should cook it the day before you plan on using it in the scalloped potatoes & ham recipe.  After all, it's meant for using leftover ham. 

So I hope you enjoy this childhood recipe.  While I almost always recommend a particular wine with a recipe, this one is best served with a tall glass of cold milk.  Yum!


Scalloped Potatoes Recipe (straight from the Betty Crocker cookbook):


The only change, as you might have noticed from scanning the recipe, is adding the ham.  Add about a 12 to 16 ounces of ham to the recipe, layering the ham in between the layers of potatoes and white sauce.  I also added a 1/2 tsp. of nutmeg to white sauce recipe.


Friday, December 24, 2010

A Roast to Remember


Christmas Roast - A Sirloin Tip Roast
On Christmas Eve, Rachel & I were back in Wisconsin in my hometown of Sussex staying with my parents for the holidays.  This December, there has been plenty of snow in the Midwest, so it definitely looked like (and felt like) winter outside.

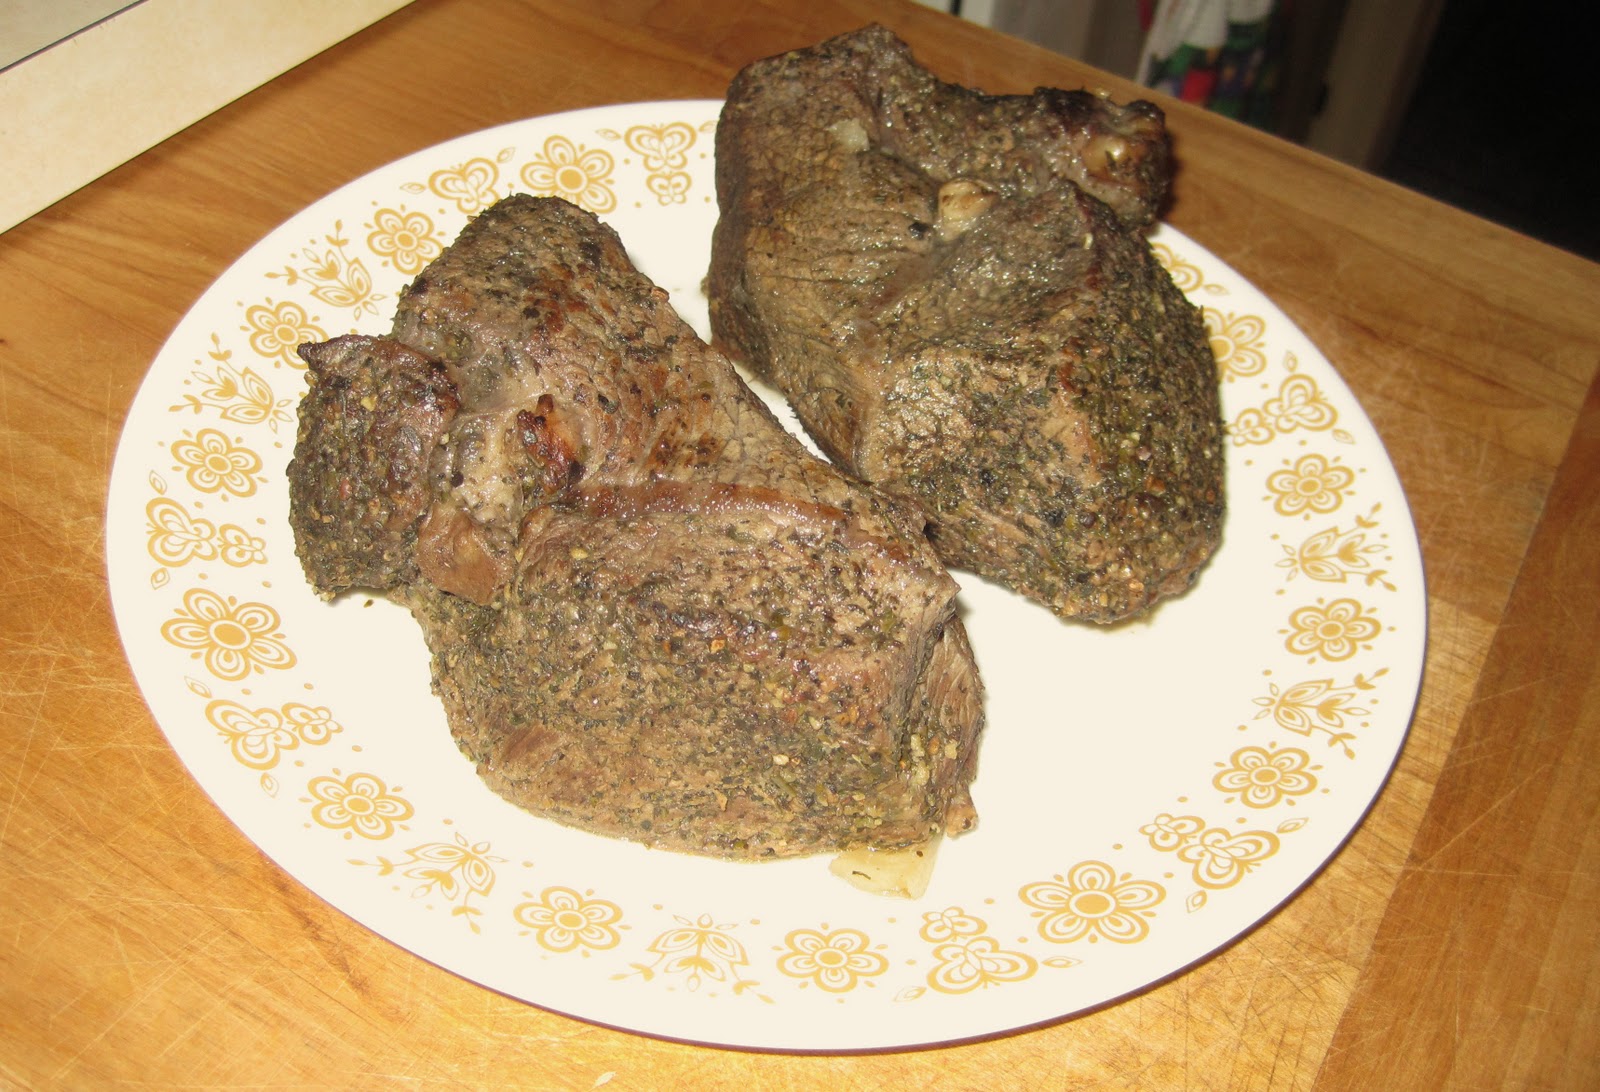
My mom and I were thinking about what to cook for dinner for the four of us, and she found a boneless sirloin tip roast in the chest freezer, weighing about 3 1/2 pounds.  When you're only two people in a household, it's hard to find an occasion or the appetite to cook up such a large cut of meat.  And with the chilly weather and the holiday, a deliciously cooked roast sounded perfect!

The roast itself was from Kummrow Farms, a beautiful small farm near Oconomowoc, Wisconsin (the town's name was derived from coo-no-mo-wauk, the Potawatomi term for "waterfall").  Kummrow Farms feeds their cattle (and bison) almost entirely on grass and hay, and does not use hormones nor antibiotics.

Roast from Kummrow Farms

Back to the cooking.  Normally, I would bake the roast in one piece until its center is a beautiful juicy, deep red color.  However, my parents prefer their beef medium to medium-well.  To tailor dinner to all four of us, I cut the roast in half.  The first half (for my parents) went in the oven about 20 minutes before I added the second half. 


The seasoning for the roast was simple.  I used a combination of salt, fresh ground black pepper, and Penzey's Italian Herbs (rosemary, oregano, and thyme).  The spice mixture was rubbed onto all sides of the roast pieces.  Then I let the roast sit out on the counter, allowing it to warm to room temperature (about 25-30 minutes).


Once the meat was prepped, I added my potatoes, onions, and celery to the roasting pan.  Since the roast was quite lean (almost all the excess fat had been trimmed off), I added some rendered pork fat to the vegetables to ensure there was enough fat in the roasting pan to keep the beef from drying out and to give it that extra boost of flavor.  I placed the pan in the oven while the roast sat on the counter because I wanted to make sure that the potatoes would be cooked through by the time the roast was done baking.

Before adding the roast to the pan, I always brown/sear it.  I feel it seals the juices inside the roast, and ensures a juicier end product.  But you can skip this step if you're pressed for time.

For side dishes, I cooked up some delicious cinnamon-honey glazed carrots, using the recipe from Food & Wine (carrot recipe link).  I also baked my buttermilk biscuit recipe, which I posted last month (biscuit recipe link). 


For wine, we chose a 2007 La Linda Malbec and a 2003 Proemio Cabernet Sauvignon, both from Mendoza, Argentina.  These are big, full-bodied red wines with plenty of spice, acidity, and tannins to handle the pepper and herb flavored roast.  Other great options would be a full-bodied Syrah or Merlot.  If we had a nice red Bordeaux on-hand, it would have been another good option.


The British Empire

I looked briefly at the history of the roast.  While I'm sure humans have been roasting cuts of bison, pigs, cows, and woolly mammoths for millennia, the modern 'roast' seems to be a British invention.  I read somewhere that roasts were a common Sunday meal because the bakery ovens, which were used for baking bread throughout the week, were available on Sundays because the bakeries were closed.  It is interesting to look at a map of British influence and where roasts are most commonly served.  Today, the UK, Ireland, Australia, New Zealand, the US, and Canada, which were all at one time under the control and/or influence of the British, are places you'll likely find roasts on the family menu.


Merry Christmas everyone!  Enjoy the holiday season and the time spent with friends & family.


Sirloin Tip Roast Recipe

Ingredients:
One 3 to 4-lb sirloin tip roast (or similar beef roast)
1 large onion, roughly chopped
2 to 3 lbs. potatoes, cut into bite-sized pieces
2 stalks celery, diced
1 medium carrot, diced
3 cups beef stock (you can substitute chicken or mushroom stock)
1/2 cup red wine
2 T. olive oil or rendered meat fat
Dried herb mixture (combination of rosemary, oregano, and thyme)
Dash of cayenne
Salt & Pepper


Directions:
1. Preheat oven to 350° F
2. Prep roast by rubbing salt, pepper, and herb mixture all over the outside
3. Leave roast on counter at room temperature for 25-30 minutes
4. Place vegetables in a large roasting pan, add salt, pepper, herb mixture, cayenne, and oil/fat.  Stir and place in the oven.
5. Bake, uncovered, for 25-30 minutes.
6. Add about 1 cup of stock to the pan (make sure there's always enough stock to fill the pan about 1/2" to 1" high)
7. Turn the oven down to 275° F8. Brown all sides of the roast in a large skillet, then add to the roasting pan.
8. Cover and bake for about 45-60 minutes.  It might need more time if it's a larger roast or if you prefer medium or medium well beef.  Use a meat thermometer, placing in the thickest part of the roast.  145° F for medium-rare, 160° F for medium, 170° F for well-done.


Saturday, December 11, 2010

Soup’s On: Mushroom

Mushroom Soup


Soup is polarizing.  For some, it is the highlight of the meal, the perfect dish to demonstrate a chef’s ability (or lack of ability), a light lunch, or simply a comfort food to warm up on a cold day.  For others, me included, soup is overrated.  Either it’s a bland, broth-based soup with mushy vegetables or it’s an indulgent, creamy soup that makes you feel guilty.  In a restaurant, I always opt for the salad.


Prepping all the mushrooms
However, even for non-soup people like me, a soup comes along every once in a while that is the perfect combination of flavor, texture, and even healthiness.  This soup recipe, which I adapted from F&W’s Wild Mushroom Soup, turned out very well.  My friends and I love its hearty texture and earthy flavors.  As I mentioned in my previous entry on Asian cuisine, this soup also has the umami component, which comes from all the mushrooms (which deliver this type of flavor). 

I also enjoyed cooking it because you have a lot of flexibility within the recipe.  If your grocery store or farmer’s market has a good variety of mushrooms, you can pick out whatever is on sale or whichever mushrooms you love to eat.  I used a combination of white, portabella, and shiitake mushrooms, along with the some unusual ones, such as trumpet and oyster mushrooms. 


Another flexible aspect of the soup recipe is its texture.  I pureed my most recent batch only once, which made it slightly chunky.  However, if you prefer a very smooth, completely homogeneous soup, you can puree the soup again after adding the stock and water.  The viscosity of the soup is also a variable, which you can change to meet your taste.


Fresh portabellas

The only other soup I enjoy as much as this hearty mushroom soup is a well-made, roasted tomato soup.  If you have a favorite soup recipe, please post it below and I'll try it out.


Enjoy!


Mushroom Soup
(serves 6-8 bowls of soup)

Ingredients:
1 T. olive oil
¼ lb. pancetta, chopped
2 pounds mixed mushrooms, stemmed and thinly sliced
2 medium shallots, finely chopped
1 tsp fresh thyme, minced
¼ tsp fresh sage, minced
¼ tsp fresh rosemary, minced
¼ cup Marsala
2 T. Sherry
¼ cup heavy cream
1 quart mushroom stock (or low-sodium chicken stock)
2 cups water
Salt and freshly ground pepper
Chives, minced (for garnish)


Directions:
1. In a large pot, heat the olive oil
2. Add the chopped pancetta, cooking until it’s golden brown, 5-7 minutes
3. Remove pancetta and place on a plate with a paper towel to absorb the oil (but do not clean out the oil in the pan)
4. Add mushrooms to the pot, along with salt & pepper
5. Sautรฉ until mushrooms cook down, about 10 minutes
6. Add the shallots and fresh herbs, stir, and let cook for 3-4 minutes
7. Add the Marsala and Sherry, stir, and let it reduce by half
8. Add heavy cream and return crispy pancetta to the pot; turn off heat
9. Using a food processor, blend the mushroom mixture into a fairly smooth consistently (or more to your preference)
10. Return the pureed mushroom mixture to the pot, add the stock and water
11. Bring to a boil, then reduce heat to low and let cook for another 10-15 minutes, or until the soup reaches your desired consistency
12. Serve with fresh minced chives


Friday, December 3, 2010

Asian Food Night

Green chicken curry (Thai)

The last few entries have been focused on traditional American comfort food.  I love my stews, potato salad, and big American-style breakfasts.  But I also love Indian, Thai, and Chinese food.  These cuisines are HUGE on flavor!  Countless spices, such as coriander, cumin, and cardamom, tantalize your taste buds.  Fresh garlic, ginger, lemongrass, cilantro, and Kaffir lime leaves add layers of complexity to the food.  And the pungency of fish sauce, bean paste, and oyster sauce give Asian cuisines the umami component missing in many Western dishes.

***

I first fell in love with Thai food in Minneapolis, tasting my first coconut-based curries and Pad Thai at a local restaurant called Sawatdee (a common Thai salutation, meaning hello, goodbye, good day, etc.).  I was a little hesitant to try these very different foods (I was only 19, and eating an onion was a bold move).  My then girlfriend had brought home leftovers, specifically green curry chicken.  Finding it in the fridge the next day, I heated it in the microwave, and started eating it.  Wow!  In addition to the delicious flavor, the spiciness of the chilies was intense. 


Papaya salad
In addition to exploring Asian cuisine in restaurants, I began cooking Asian dishes a few years ago.  Most of my cooking focused on Thai and Vietnamese, which were my favorite cuisines at that time.  After a year or two of indulging in homemade curry pastes, papaya salads, and delicious stir-fries, I was craving something new.  


It was then that I had my first really good Indian feast.  Rachel’s friend from work invited us over for a dinner party.  Her friend had grown up in India, as did her husband.  For dinner, they made these delicious dishes, such as grilled paneer (an Indian cheese) with vinegared red onions, dals, and lamb.  I can’t recall all the exact foods they prepared.  I just remember leaving that night, stuffed, and very excited about Indian food!


Always prep your ingredients for Asian recipes (they move fast)

Indian food is one of the most challenging cuisines to cook at home.  First, you need dozens of spices.  Second, the prep time can require hours, especially if you’re making a few entrees and the common dipping sauces for naan (Indian flatbread).  Since I started cooking Indian in 2008, I have only had the time (or patience) to cook full Indian dinner parties a few times.  It’s just too exhausting!  It makes me really appreciate Indian food, whether at a restaurant or a friend’s house.


***


Thai Basil Chicken, Szechuan Broccolini, and Stir-Fried Cabbage
Back to the present.  Rachel & I had a couple friends coming over for dinner, and we knew they liked to eat more vegetables than meat.  Asian food is great for this preference, and I wanted to find a couple new recipes to complement my Chicken Basil stir-fry dish (something I make every few weeks).  I found a delicious, spicy recipe for broccolini (not baby broccoli but actually a cross between broccoli and kai-lan).  And another recipe that turned out very well was a spicy stir-fried cabbage.  As with most Asian recipes, make sure to prep everything in advance, since most of the recipes move quickly.  My favorite tool in the kitchen is a well-crafted knife.  One of my good friends gave me a Global chef's knife a few years back, and I love it!  


Link: Global 8" Chef's Knife


For wine pairings, I recommend Gewurztraminer or Riesling.  The residual sugar in these wines handles the spice and intense flavor of the food.  I also love beer with spicy Asian food.

Enjoy!


Stir-fried Chicken with Basil

Ingredients:
5 cloves garlic, minced
2 Serrano chiles, minced
3 T. peanut oil
1 lb. chicken breast, cut into bite-sized pieces
½ medium red pepper, cut into bite-sized pieces
½ medium green pepper, cut into bite-sized pieces
20 leaves of Thai or regular basil
4 oz. button mushrooms or large white mushrooms, roughly chopped (optional)
4 oz. roasted, unsalted cashews (optional)
1 tsp cornstarch mixed with 1 T. water
Sauce: 4 T. fish sauce, 4 tsp soy sauce, 4 tsp sugar, 2/3 cup water


Directions:
1. Mix up the sauce
2. Heat wok or large frying pan to high heat, then add the oil
3. Add the garlic and chiles; stir & sautรฉ for 30 seconds
4. Add chicken and lightly salt it; then stir & sautรฉ for 2 minutes, or until it begins to turn white
5. Add onions, peppers, and mushrooms (if using), and light salt it; then stir & sautรฉ for 3-4 minutes
6. Add sauce, mix well, and sautรฉ for 30 seconds
7. Add cornstarch mixture, stir, and sautรฉ for 30 seconds
8. Mix in basil and cashews
9. Taste for salt and spice level, and adjust accordingly
10. Serve over rice


Szechuan Broccolini

Ingredients:
1 T soy sauce
1 T rice wine vinegar
½ tsp sugar
1 T sesame seeds
2 tsp vegetable oil
½ tsp red pepper flakes
½ tsp grated ginger
1 garlic clove, crushed
1 T peanut oil
3 cups broccolini (baby broccoli)

Directions:
1. Mix soy sauce, vinegar, and sugar in bowl and set aside
2. Heat a wok or large skillet to high heat
3. Add oil
4. Add red pepper flakes, ginger, and garlic
5. Stir for 30 seconds
6. Add broccoli and stir for 1 minute
7. Add soy mixture and stir
8. Sprinkle with sesame seeds
9. Serve over rice


Stir-fried Cabbage with Chiles & Ginger

Ingredients:
½ lb. Green or Red Cabbage, cut into strips
2 slices bacon cut into ½” pieces
1 clove garlic, minced
1 Serrano chile, minced (or to taste)
3-4 slices of fresh ginger, cut into ¼” slices
1 star anise
1/4 tsp salt
2 tsp soy sauce
1 T. peanut oil


Directions:
1. Heat wok or large frying pan to medium heat, then add oil
2. Add bacon to the oil before it gets too hot (you want the bacon fat to melt into the oil a little)
3. Sautรฉ bacon for 1 minute, then add the garlic
4. Sautรฉ for another 2 minutes, or until the garlic begins to brown slightly
5. Add the ginger, chiles, and anise; stir
6. Add the cabbage, stirring to coat the cabbage thoroughly
7. Sprinkle with the salt, and let sautรฉ for 5-6 minutes, or until the cabbage has begun to wilt
8. Add the soy sauce, stir
9. Taste for salt and spice level, and adjust accordingly
10. Serve over rice


Wednesday, November 17, 2010

Biscuits & Gravy

Biscuits & Gravy


Ahh…breakfast.  I love the wonderful aroma of coffee slowly rolling through the house on an early morning.   Or that unique slightly burnt toast fragrance, which always reminds me of my grandparents’ house in central Wisconsin.  And who doesn’t enjoy the smoky, savory smell of bacon on a lazy Saturday morning (aside from vegans and vegetarians)? 


Growing up, most of my weekday breakfasts consisted of cold cereal, toast, or maybe a Pop-Tart.   On occasion, my family and I would also enjoy a nut or fruit kringle (a Danish pastry), which are for some reason, made in Racine, WI (a city located in between Milwaukee and Chicago with a strong Danish heritage).  On the weekends, my mom made pancakes, French toast, scrambled eggs, bacon, or cinnamon rolls.  I always looked forward to waking up to the smell of bacon.  Yum.


Today, I still love to cook up a big, American-style breakfast on the weekends.  My go-to is a combination of roasted baby red potatoes, over-easy fried eggs, and thick-cut bacon or spicy sausage patties.  When Rachel makes breakfast, she goes for sweet...cooking up pancakes or French toast.

Most recently, I had an urge to cook up another American breakfast dish, particularly popular in the South: Biscuits & Gravy.  This classic dish consists of a hearty plate of buttermilk biscuits (see my previous post for the biscuits recipe) topped with a creamy, slightly spicy, sausage gravy.  


Biscuits & Gravy, with pears and hard-boiled eggs


Cooking the gravy
It’s not too hard to cook either, with the gravy recipe greatly resembling a bรฉchamel sauce.  All it requires is a little patience and the steady stirring of the gravy in the pot.  Over the 25-30 minutes of simmering, the milk, onions, and sausage thicken into a delicious, creamy gravy.  For a little extra kick, add a dash of cayenne pepper or use a spicier pork sausage.  


I could not find the origin of the recipe.  There’s a non-cited claim on Wikipedia stating it was first cooked in Green Bay, Wisconsin.  With the popularity of sausage in the German-rooted state of Wisconsin, it’s definitely possible.  Wherever Biscuits & Gravy came from, I’m happy she or he decided to mix sausage, biscuits, and creamy sauce.

Enjoy!


Biscuits & Gravy

Serves 4-6 people

Ingredients:
1 T. butter
½ cup Vidalia onion, diced
1 lb. breakfast pork sausage
¼ cup flour
3 ½ cups 1% to 2% milk
4 to 5 medium sage leaves, finely chopped
Dash of cayenne
Salt and pepper to taste

*1 tsp corn starch mixed with 1 T. warm water (optional – see note)


8 to 12 buttermilk biscuits (about 2 per person), cut in half


Directions:
1. Heat pan to medium, add butter
2. Once melted, add onions, salt, & pepper, and stir
3. Sautรฉ for 5-7 minutes, or until onions soften and turn translucent
4. Add sausage, breaking it up as it cooks through, into very small pieces
5. Once sausage is browned, add flour, stirring well to mix it into the onion-sausage mixture
6. Let cook for 2-3 minutes, stirring to prevent burning
7. Add milk, sage, and cayenne
8. Bring to a boil, then reduce heat to medium-low
9. Simmer for 25-35 minutes, stirring constantly, reducing by about half, or until you reach your desired thickness
10. Cut open warmed biscuits, and spoon a generous serving of the gravy on top

*If you are in a rush or desire an even thicker gravy, add the corn starch mixture


Tuesday, November 2, 2010

Beef Stew and Buttermilk Biscuits


Another favorite dish of mine is what my mom calls ‘no-peek stew’, famous in our family for throwing everything into a roasting pan and letting it bake for hours (without peeking at it). It’s perfect for placing the stew in the oven after lunch, going out to run errands, relax with friends, or watch a couple football games, and then return to your kitchen smelling wonderful. The aromas from this stew will surely have your mouth watering.


The recipe itself is a hand-me-down from my mom's aunt, and my mom has made it throughout my life. In fact, my brothers still request it specifically when visiting my parents, hoping for the classic childhood, home-cooked meal. Like my siblings, I also love this stew recipe, as does my better half (also my biggest fan). It’s particularly good for colder days (if you’ve been reading my last few blog entries, you might notice a trend that I’ve been cooking for the cooler weather we’ve been experiencing here in New York). And of course, you can’t forget the buttermilk biscuits and a tall glass of milk (yes, in Wisconsin, the dairy state, we love our milk, and yes, milk is commonly served with dinner). 


The essence of the recipe remains the same as my family’s version, except I have added a few things. First, I always add onion. Even if you have non-onion lovers in your household, you can enjoy the rich onion flavor without the “chunks” because the five hours in the oven will essentially melt the small diced up onion. Also, I add mushrooms because I love them, and they also break down a bit. But if you or your family members don’t like them, feel free to cut the mushrooms out. Another modification is the substitution of some of the carrots for other similar root vegetables, such as turnips and parsnips. Adding a wider variety of veggies always makes a stew a little more fun, both in flavor and in texture. Again though, if you’re looking for a simpler version, just use carrots. 


Now…the biscuits. While I have been ‘cooking’ for several years now, I have recently discovered the fun of baking. It has required a bit of patience on my end, and I have learned to strictly follow recipes (which is counter-intuitive for me since good cooking is all about improvising). But the results are definitely worth it, especially with these homemade buttermilk biscuits. The other great thing about baking things from scratch is you can control the batch size (i.e. you can half or quarter a recipe if serving only two people). I’ve also noticed that there is a fairly steep learning curve, meaning that once you’ve practiced, you start to greatly speed up the process. For example, I made this biscuit recipe for the third time the other night, and it was very easy now that I know the process. In fact, it only took about 15 minutes to prep and 15 minutes to bake. 


Well, I hope you enjoy this family recipe out of the heart of Wisconsin. It’s a good one. As for the biscuits, I learned all I needed to know about buttermilk biscuits from the blog, Food Wishes – Video Recipes. John does a great job showing you how to make the biscuits through his video, which might be helpful if my recipe is unclear (like I’ve said, I’m still new to baking…so I did my best to create a simple baking recipe). 


Beef Stew 

Serves 4-6 people 


Ingredients: 


1 ½ lbs. beef stew meat (cut into ½” cubes) 

1 ½ cups carrots or similar root vegetables such as turnips or parsnips, cut into bite-sized pieces 
2-3 cups potatoes, cut into bite-sized pieces 
½ cup diced onion 
2 stalks celery, diced 
6 oz. button mushrooms (optional) 
2 T. corn starch mixed with 2 t. water 
1 package Lipton Dry onion-mushroom soup mix* 
1 T. Sugar 
1 ½ tsp salt 
¼ tsp pepper 
12 oz. tomato juice 
12 oz. water 


*I have tried creating substitutes for this product because I generally believe homemade is better than processed; however, my three or four attempts have all come up considerably short of the Lipton soup mix, so my advice is to stick with it. 


Directions: 

1. Preheat oven to 275ยบ F 
2. Mix all the ingredients in a large roasting pan or a casserole dish 
3. Cover and bake for 5 hours 
4. Serve 


Homemade Buttermilk Biscuits 

Makes about 5-6 biscuits 


Ingredients: 

1 cup all-purpose flour 
1 tsp baking powder 
1/8 tsp baking soda 
1/2 tsp salt 
3 1/2 T. unsalted butter, cut into thin slices, chilled in freezer 
3/8 cup cold buttermilk 


Directions: 

1a. Place butter in the freezer for at least 30 minutes (important for the texture of the biscuits) 
1b. Preheat oven to 425 F 
2. Mix all dry ingredients in a large bowl 
3. Using a pastry blender (http://www.kingarthurflour.com/shop/items/pastry-blender), cut the butter into dry ingredients for about 3-4 minutes, until the butter and dry ingredients are well mixed and have a consistency similar to Kraft grated Parmesan cheese 
4. In the bowl, make a shallow valley in the butter-flour mixture for the buttermilk 
5. Pour the buttermilk (it should also be kept very cold) into the valley 
6. Gently mix the buttermilk into the mixture, just until it is absorbed (careful not over-mix) 
7. Dump dough onto a flat, clean surface 
8. Using your hands, work the dough a little until it begins sticking together 
9. Work the dough into a rectangle shape, about 1" thick, and fold it on top of itself; do this step a 2-3 times 
10. Add a little flour to the surface area, and use a rolling pin to roll the dough into a thin 1/2" layer 
11. Using a biscuit cutter or the top of a glass, cut out biscuits 
12. Mix scraps together and repeats steps #10 and #11 
13. Place biscuits on a thin cookie sheet 
14. Using your thumb, press down gently on each biscuit 
15. Take a little extra buttermilk, and brush onto the biscuits 
16. Bake for 15 minutes, or until the biscuits are a nice golden brown